Tuesday, June 18, 2013

Multimedia Research Papers

Contributed by Robert McCord, Instructor of English

This last year I decided to try and create multimedia research paper assignments for my students in English 152. I’ve taken some PLS courses in the topic, and I wanted to try them out.

In one class during Fall 2012, the students wrote two traditional and one multimedia paper. For two classes in Spring 2013, all three papers were multimedia. Paper topics included motorcycle helmet laws, the influence of online technology in our lives, food and health in America, and sustainability. I surveyed the classes to assess their reaction to the new types of writing projects, and I've included the results and my conclusions at the end of this post.

istockimage
First, to define multimedia papers, I chose a model with a standard argumentative research paper at its core, and augmented with several media tools such as a Power Point slideshow, an online animation, or a pamphlet.

I graded the paper with a standard rubric. The media components were graded with separate rubrics. All elements had their own value in points, and each had a separate grade. The idea behind this is for students to work not only on research and writing, but to convey their argument in several different ways. The paper is the standard written and researched argument. The media components allow for visual and audio means of communication.

In addition, students can work with various writing situations. For example, the Power Point slideshow is for a small group presentation, and is accompanied with a narrative script. The student would present the argument in a format to fit small group interaction and visual imagery. The pamphlet has a different audience: a reader who only has two sides of a folded paper to get the main points. An online animation can be used like a Public Service Announcement (PSA) where the audience has only a minute or so to view the video and get the message. Also, we practiced using other media tools as homework assignments.

Here are some of the media tools we used:
  • GoAnimate: This is an easy and fun way to make online animations. Students create a free account and can make short videos. They can send the link to the instructor for viewing. We used this and XtraNormal to make PSAs on our topics. Usually the animation was a dialogue between two characters.
  • XtraNormal:  Another fun, free, and easy online animation tool
  • PicMonkey:  Free online photo editing, with no account needed. We used this to make collages – purely visual communication. Students can use online photos and cite the sources.
  • YouTube: We made playlists based on our paper topics and links can be shared. This allows students to collect informative and useful videos into one page for others to view. We didn’t need to make our own videos, but a free account is required.
  • Blogs: I set up blogs for students in Angel. Students posted on their own blogs and responded to others’ postings. It was a fun way to get some online interaction in the classroom. I’m sure the same features are available in Canvas.
  • Pamphlets: MS Word has some nice pamphlet templates. For this media students must communicate the basics of their paper on one sheet of paper, printed on both sides. It’s almost like an outline with some graphic elements. We printed them out and folded them.
  • Letters: For one project on Illinois motorcycle helmet laws, I had students write to their state representative to express their view on the issue. Sending the letter was optional! 
     
In their final drafts, students submitted their papers along with one or two media tools chosen from a list. Sometimes I had all the students use the same tool, such as a Power Point slideshow, and at other times students chose which tool to use. I tried to get the students to think of the separate elements as parts of a whole – the multimedia research paper. The paper and media components were put in separate drop boxes, but they were supposed to coordinate with each other.

So, how did the students react to this? At the end of each semester I surveyed them, and here are the results:
  1. Students in two courses in Spring 2013 were asked which they preferred, multimedia or traditional papers. Out of 32 student answers, 23 preferred traditional papers, and 9 preferred multimedia papers. I was surprised at how many liked the old-fashioned research paper! Some expressed that it was easier because it was so familiar. Others thought that the media components just repeated what was in the paper (that was part of the point!). They didn’t get that the communication environment shaped their presentation.
  2. Students in the Fall 2012 course were asked if they preferred writing all traditional papers, a mix of traditional and multimedia papers, or all multimedia papers; 19 Students answered: 3 wanted only traditional papers, 12 liked a mix, and 4 wanted only multimedia papers. Here students express cautious interest in the new paper form, as long as they get to write standard papers, too.
  3. Students in the Spring classes were asked about which media components they liked and disliked. Here the data is mixed. Almost every tool had similar numbers of likes and dislikes, except for the Power Point & script, which had only one dislike and 11 likes. It is the most “traditional” of the media components, so students again are expressing a preference for what they already know. 
Conclusions:
We’re often told that students are bored with the same old assignments, and that their work should be relevant and exciting, with lots of online and hi tech elements. I agree with this! However, my students were less sure of this idea. Perhaps when it comes to grades they want the tried and sure assignments they’ve been doing for years. 

Also, I think the idea that shaping their argument to fit different situations is new to them. Good! I want to expose them to new methods of communicating. I am pleased with the results so far and will continue to assign multimedia projects, along with traditional papers. I hope that with Canvas, there may be new ways to put the elements together in one package that gives it a greater sense of unity. For example, I could have students create a portfolio on Canvas for the multimedia paper, so that each element is represented by a link on the page. This could help students see each element as part of a larger whole.      
Wednesday, June 12, 2013

Graphic Organizers in the Classroom

Contributed by Lisa Crizer, Instructor of English, and written about her English & Sociology Learning Community, "'Til Divorce Do Us Part."

One of the things we struggle with in our learning community is something I think every instructor struggles with during a given semester—ensuring that the students are reading the assigned material.

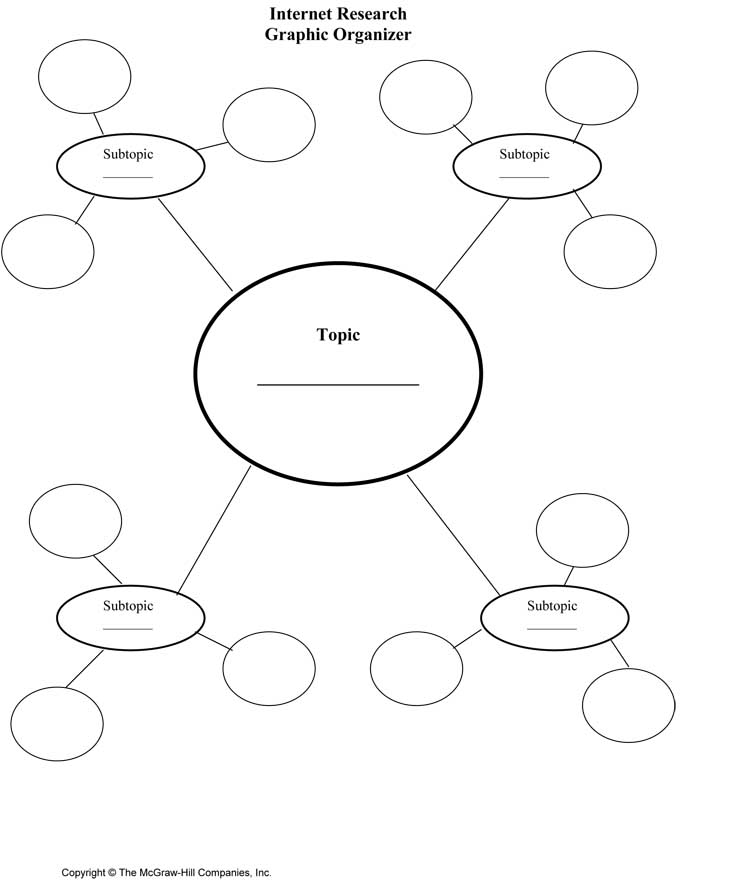
After a few lackluster discussions, Shiela and I decided to try some techniques to encourage students to be a bit more prepared for class and participate more in discussions. One of the activities we incorporated into class was the use of a graphic organizer to help students keep track of what they read and better respond to the material.

The activity asked the students to:
  • Identify the claim—“What is the key argument being made by the author?”
  • List some of the data—“What facts does the author present to support his or her claim?”
  • Interpret the argument—“What is your overall understanding of the author’s argument and what do you think of the piece as a whole?”
We were very pleased with the outcome of this activity. Students were able to formulate their thoughts before class and this was evident in much livelier class discussions. An interesting and unanticipated outcome was that the responses that students gave were pretty varied. Not everyone brought up the same key arguments, and not everyone presented the same data. The variety of responses really added to the class discussion. Overall, this activity was a success and we plan to use it again in our future Learning Community class.

Type "graphic organizers" into Google Images for more results like this one!

Type "graphic organizers" into Google Images for more results like this one!

Type "graphic organizers" into Google Images for more results like this one!

Type "graphic organizers" into Google Images for more results like this one!


 How do you ensure that your students are doing the required reading?
Let us know in the Comments section below!

Monday, June 10, 2013

Using Your Brain: Notes from NISOD

Julie Freelove, Jim Falco, and I were able to attend NISOD's 35th Annual International Conference on Teaching & Leadership Excellence (and Juletta Patrick was able to present at the conference! check out her blurb on page 38 of the conference program PDF).


The three of us scoured through thirty-one pages of breakout session listings to find some really terrific sessions, and today's post will give you a few tidbits from two of them.

On Monday, May 27, the first full day of the conference, I attended two back-to-back workshops led by Dr. Janet Zadina, an educational neuroscientist and adjunct associate professor at Tulane University's School of Medicine. I hadn't planned on attending Zadina's second session ("The Multiple Pathways Model: Using Brain Research to Orchestrate Teaching and Learning"), but during her first session ("Tapping Into the Brain's Reward Pathway to Energize Instruction") I quickly recognized that she was a presenter with great content and great style; so I decided to attend her second workshop.

Dr. Zadina and a brain (not her own)
One thing Zadina talked about that hit home was student success in the classroom. There are many reasons students don't succeed in any particular class, but one of the things that we, as instructors, can address specifically is a student's lack of prior knowledge.

Zadina gave tips for addressing this:
  • Give students some background information (a YouTube video clip, a newspaper or magazine article that's slightly below reading level) on course content before they start a new reading or project; this will help them to create a meaningful context for the material and will help them dip their toes into water that may be very cold and very unfamiliar
  • Use visuals whenever you can (we use emoticons and emojis in text messages and casual e-mails to signal meaning [especially sarcasm], so why not use images and pictures with students to help communicate the meaning behind the words and concepts?)
Cookies & photos by Bee In Our Bonnet--maybe a perfect project for a pastries class...?

During the second workshop, which focused on the brain's frontal lobe (a good frontal lobe = a good life!), Zadina gave some great tips for helping students learn those all important "executive" (higher level) brain functions:
  • Teach students the process of doing the tasks by modeling them ahead of time during class
  • Show students how to take good notes (on days one or two of the semester, show them your own notes from a seminar or workshop, and spend a minute talking about your own process)
  • Show students how to study for tests and quizzes (use small groups or in-class study sessions to model good studying)
  • Start with short-term, concrete projects before moving on to long-term higher-learning function projects
  • Require meta-cognition (before an assignment or quiz/exam, ask students to answer questions like How much time do I plan to spend preparing for this assignment/quiz? and What techniques will I use to complete this assignment/study for this quiz? After assignments, students can answer questions like Am I satisfied with my final product? and What will I do differently to prepare for the next assignment/quiz?)
There was so much more great information, but hopefully this will get you started thinking about how to be more aware of students' brains and how we can use our own amazing brains when preparing for class.
Look forward to more notes from NISOD, coming soon!

Saturday, June 08, 2013

Dr. Dow’s Spring Break

Contributed by Beverly Dow, Instructor of Biology

At the end of March, I went to Costa Rica with my husband and two other couples. A trip to the tropical rainforest is a required item on the bucket list of any plant ecologist, and I figured I’d better get down there while there was rainforest left to see.

We spent 5 days at an ecotourist resort called La Paloma Lodge on Drake Bay (Pacific Ocean). There were no cars on our side of the Rio Aguitas. We toured the Corcovado rainforest, snorkeled off CaƱo Island, boated through a mangrove swamp, and did a night hike with the Bug Lady. I took 692 pictures of leaves, flowers, fruits, tree, monkeys, sloths, hermit crabs, birds, lizards, spiders, insects, and on and on!


The rarest thing we saw was an ocelot on the night hike. I will certainly be able to spruce up my ecology lectures for next fall!

To see some of the pictures and read about my trip, check out the March posts on my blog, Fiacre's Spade.  You can also read about our garden, cooking experiments, laying hens, and new adventure in raising meat chickens.


Have you taken a trip this summer that you're planning on working into your class? Let us know! And if you write your own personal blog, e-mail us the link so we can add it to the Faculty Blogs list (on the left-hand column here). We'd love to know what you're up to!